console.log() in a mobile browser

I am working on a web project for a client with mobile-specific features and I needed to be able to do a lot of console.log() and I quickly found out that you can’t really do that on an actual mobile browser without connecting the device to a computer. This is fair and I get it but it’s annoying when you have to test a bunch of different devices or you don’t have a Mac. Especially when all you want to do is look at what get’s written to console.log().

So I put together a quick JavaScript that intercepts calls to console.log() and writes them to the dom in a neat little box that sits at the bottom of the screen. You can move it around and collapse it if you want, too. The script is hosted on my GitHub pages so that it can be used by anybody from anywhere and I even made a bookmarklet link for you and script element that you can copy-paste.  https://matthewcv.github.io/mobiledebug.html

It only implements log(), info(), warn() and error() for now. The next thing I want to do is implement dir() and I think it would also be useful if it gave you a place to run arbitrary JavaScript code just like the developer console in desktop browser.

Web App Development with Aurelia, Part 3: Upgrading Stuff

This is the third in a series of blog posts which I am using to document and demonstrate the development of a real-world Aurelia web application. In this post I will describe upgrading all the tooling and libraries. Also check out Part 1: Introduction and Part 2: Setting Up the Dev Environment

Since the last post there have been a lot of new releases. Visual Studio and .NET Core have new releases so I upgraded them easily by running the installers. Upgrading the ASP.NET Core app was easy too. In the property pages for the project I just selected .NET Core 2.0 as the target framework. I also needed to update all the packages to the latest version. This was also done very easily in the NuGet Package Manager. 

Aurelia also has a lot of updates. There are updates to many of the NPM modules including the Aurelia CLI. Upgrading the Aurelia app is a bit trickier though because there isn’t any tooling at the moment so it has to be done manually. I’ll start by upgrading the aurelia-cli global NPM module.

You can see that I was on version 0.27.0 and now I’m on version 0.31.0. The next step will be to upgrade all the local packages. My first thought was to just ‘npm upgrade’ everything but that doesn’t fully get it. The Aurelia CLI generates a lot of things for us and I want to have the latest of that stuff too. What I am going to do instead is use the latest CLI to generate a new app and compare the two. Then I’ll merge the new stuff into my existing folders.

I created a new folder called mmCount1 and I’ll execute the au new command just like I did before with the same answers. There were a couple new questions. It asked what module loader I wanted to use with the options requirejs, systemjs and webpack. I know that Aurelia had been using requirejs before so I selected that. It also asked what editor that I am using but Visual Studio was not an option so I just left that one as the default which was Visual Studio Code so that I could see what it did. With the new project created, I can compare the differences. 

The folder structures are the same with only a few differences that I care about. Almost verything under the aurelia_project folder is code that I have not edited and is generated by the CLI. I am just going to copy everything in there from the new folder to the old. I do have to make one small change though. In aurelia.json I need to change the name back to ‘mmCount.’ This probably isn’t important but I did it anyway. I also need to put ‘aurelia-http-client’ into the bundles.dependencies section just like we did before when we installed that module. The rest of the folders I don’t care about because they are either from VIsual Studio or contain my own code that I don’t want to overwrite or don’t have any changes. There are three files in the root that I do care about. Karma.conf.js, package.json and tsconfig.json. I have not made any changes to the karma or tsconfig files so I’m going to just copy them over. In package.json, the only change I have made so far is to add the aurelia-http-client package. I am going to remember that and then copy the new file over the old.

So now I have all the files the way I want them but the app is still not fully upgraded yet. I need to npm install to get all the latest modules that are defined in the new package.json and then I need to install aurelia-http-client again. Before I do that though, I am going to delete my node_modules folder just to make sure that all the right versions of the right things get installed. When everything is installed I can au run and open the app in the browser to verify that everything works fine. With everything upgraded and working as it did before, I am going to commit all my changes so when I start adding new functionality there’ll be a fresh staging area in the repo. And that’s it! The whole process only took about half an hour and was really easy.

In the next post I’ll add logging in with Auth0!

Web App Development with Aurelia, Part 2: Setting Up the Dev Environment

This is the second in a series of blog posts which I am using to document and demonstrate the development of a real-world Aurelia web application. In this post I will describe setting up the development environment with Visual Studio 2017. Also check out Part 1: Introduction.

Create the Git repo and Visual Studio solution

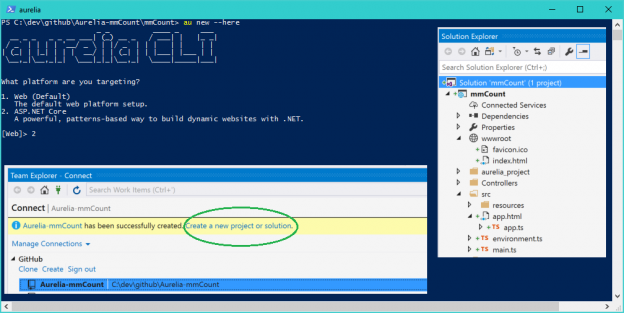
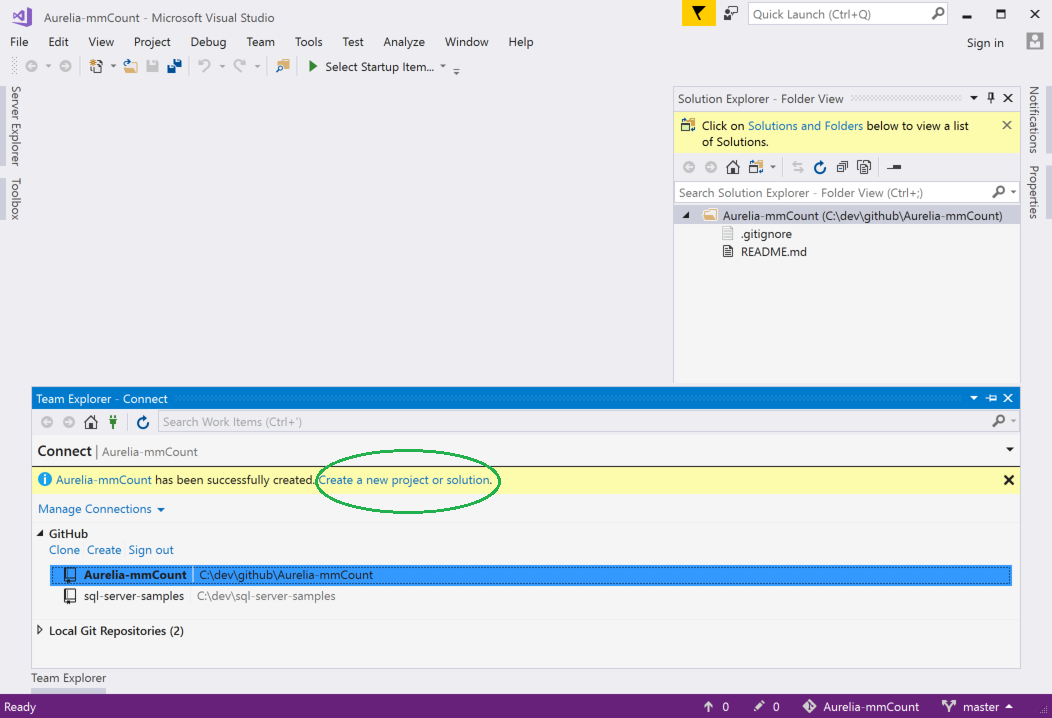
I like to use the GitHub Extension For Visual Studio so I am going to use it to create my git repo. It will automatically make the GitHub origin for me which is nice. After it’s created, the extension gives me a nice link to create a new project or solution.
Creating a git repo with GitHub for Visual Studio gives you the option to create a project in that repo.
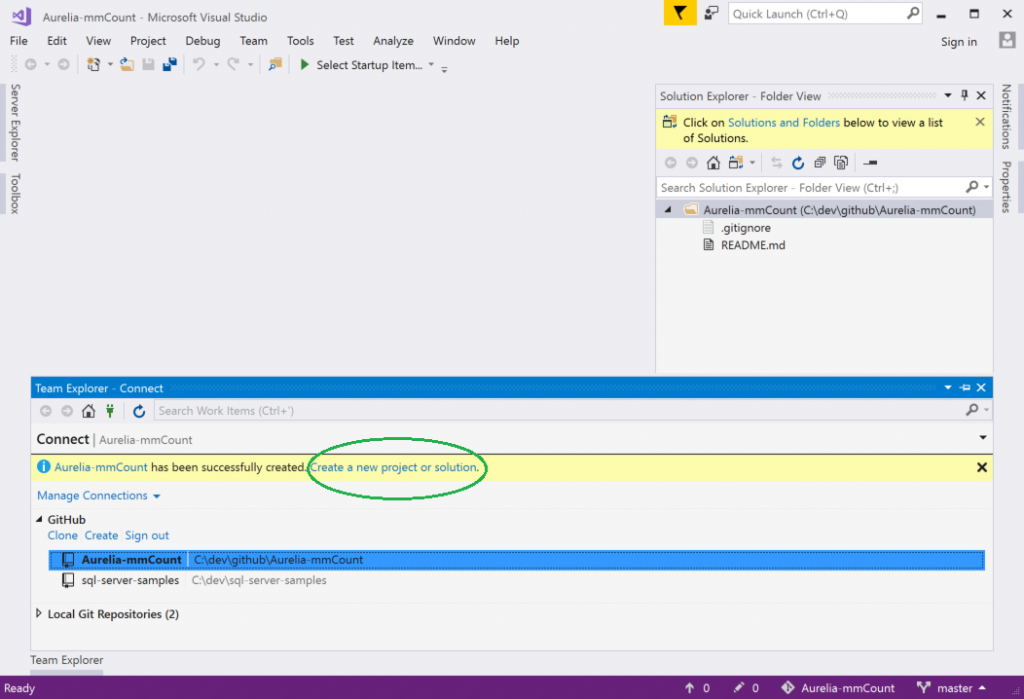
That’s what I need to do next so i’m going to click it.
As expected, it brought up the New Project dialog. I used it to create a new ASP.NET Core Web Application. The next window gives you the opportunity to chose what type of project template you want to use: Empty, Web API, or Web Application. The latter two have authentication options as well. I am going to use the Web API template with no authentication. I don’t need authentication because I am going to implement it myself with Auth0 and I don’t need all the MVC View stuff that the Web Application template provides.

Set up Aurelia

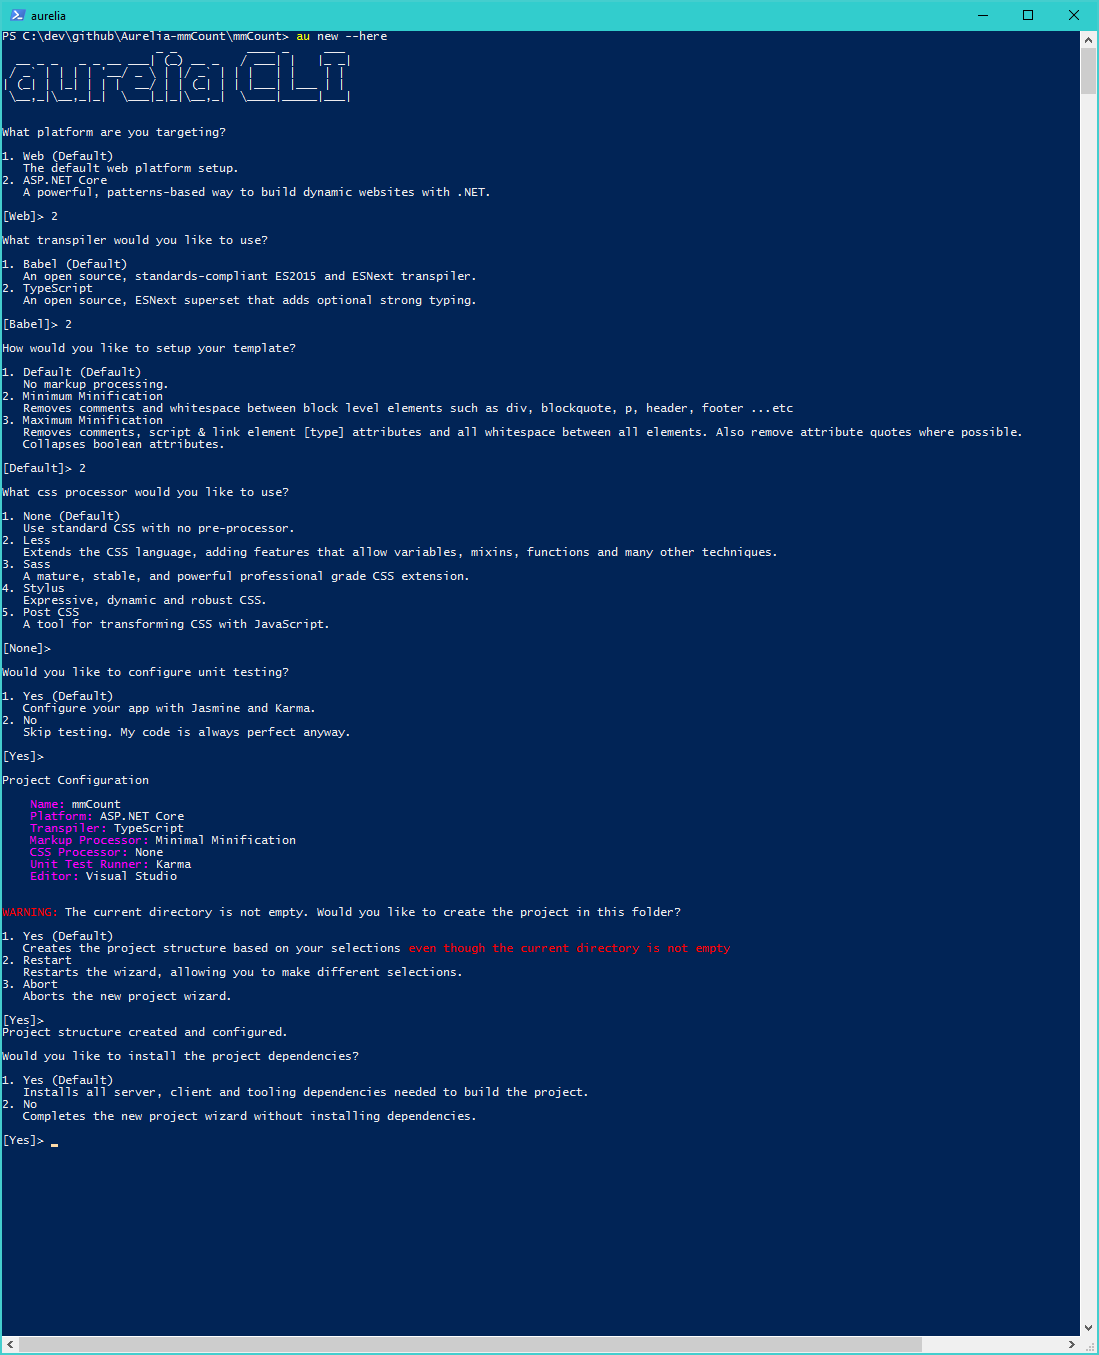
Aurelia provides several “starter kits” if you want to use JSPM/System.js or WebPack. It also has a great CLI tool which is what I am going to use. Open up a command prompt and go to the directory where Visual Studio just created the project. The Aurelia CLI requires nodejs. I usually use the latest LTS version but you need to use at least version 4.x. I strongly suggest that you use this node version manager if you’re on Windows: https://github.com/coreybutler/nvm-windows. In the command prompt, install the Aurelia CLI globally:

npm install aurelia-cli -g

Once it’s installed we need to use it to create our project. This is the command that I’ll use to do that.

au new --here

the --here flag tells it to create the project in this existing folder. If you leave that flag out, it will ask you what you want to name your project and create a folder for you. This command will ask you a bunch of questions that you must answer. This is how I did it:
answers to the au new command
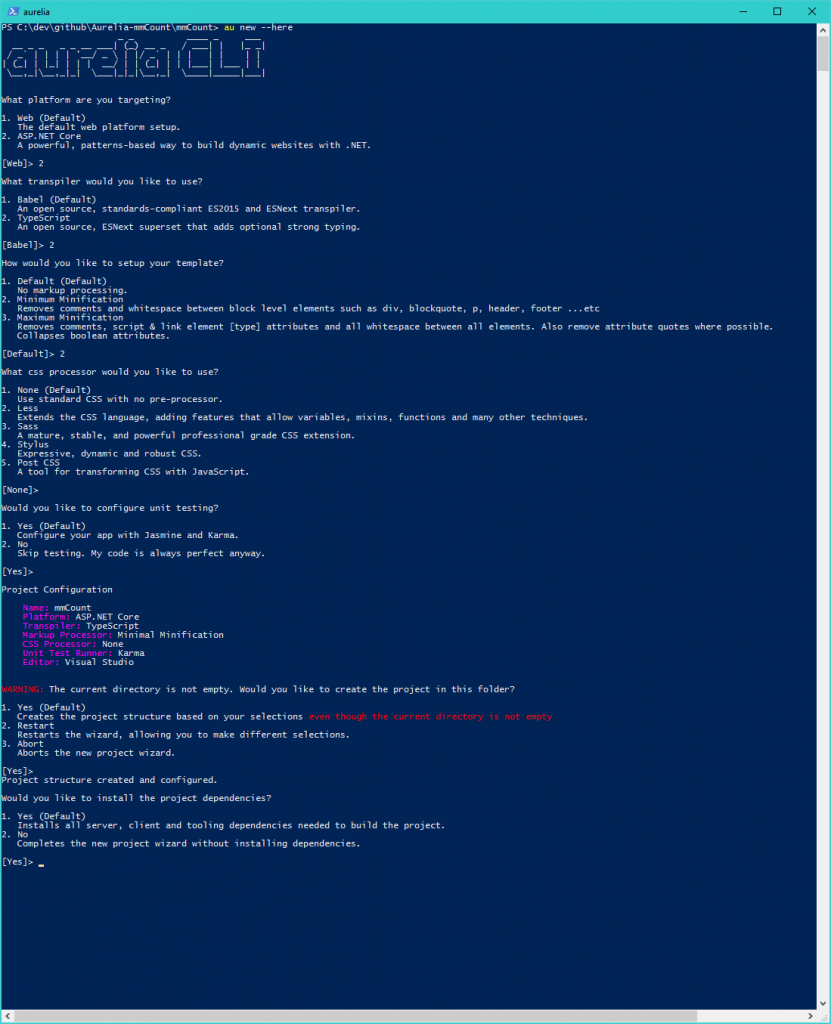
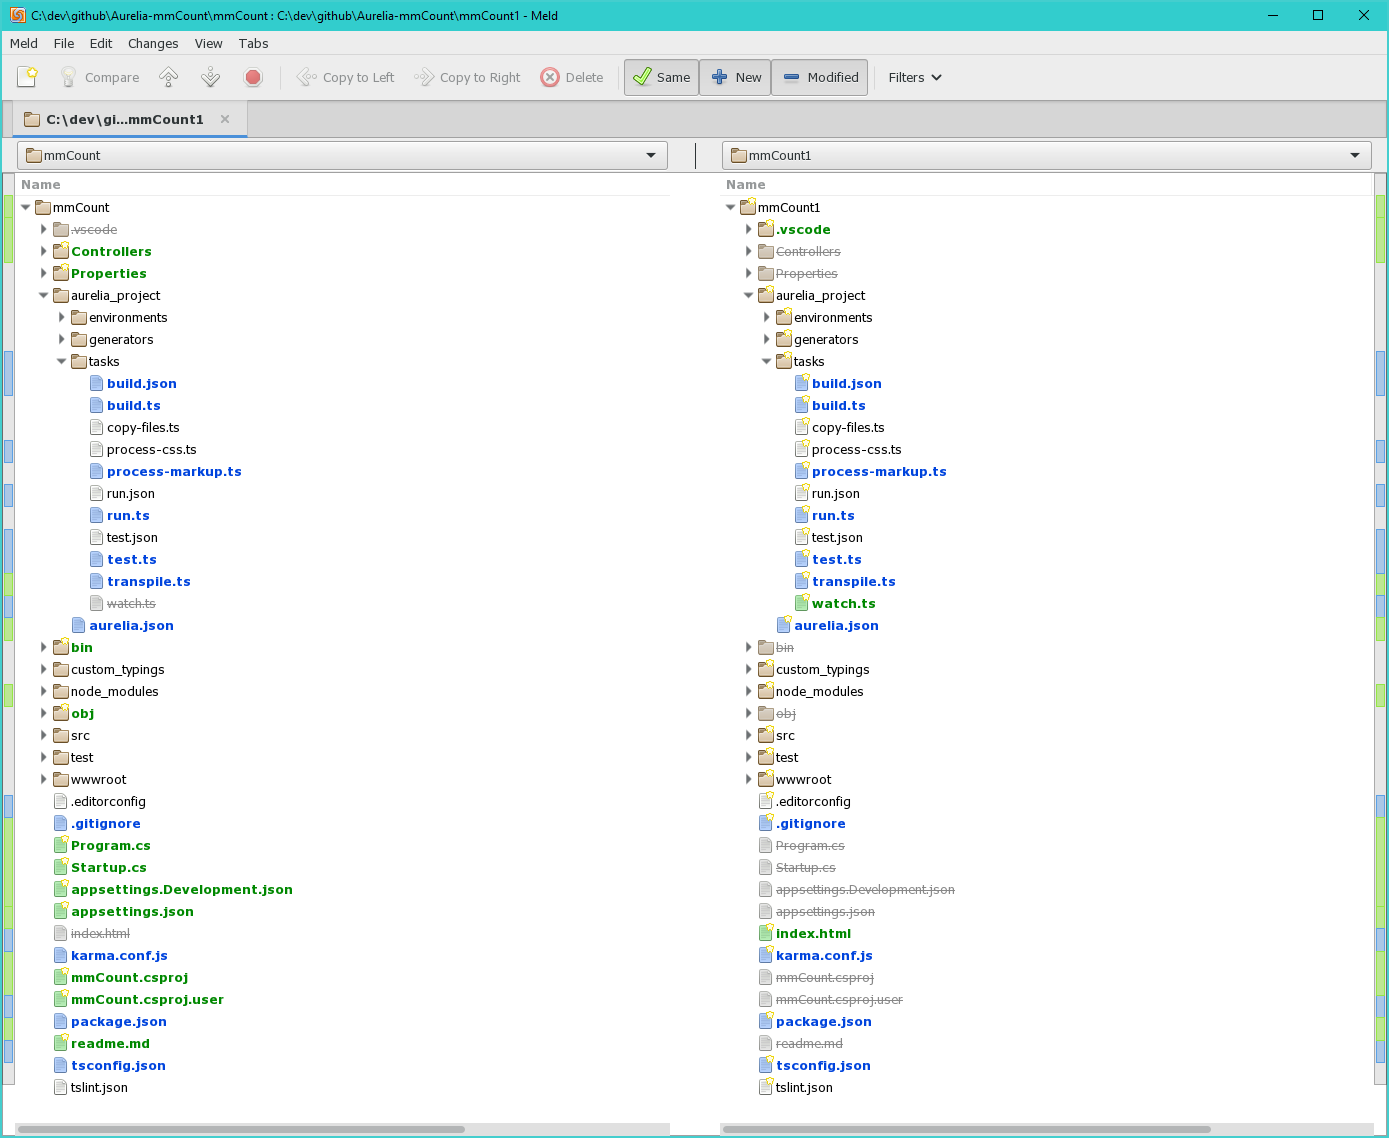
Tell it yes to install all the dependencies at the end. It will take a few minutes to do all that. When it is done it leaves you with a few remarks and you are back at the command prompt. Let’s go back to Visual Studio and see what happened. There are a lot of new things in the Solution Explorer now:

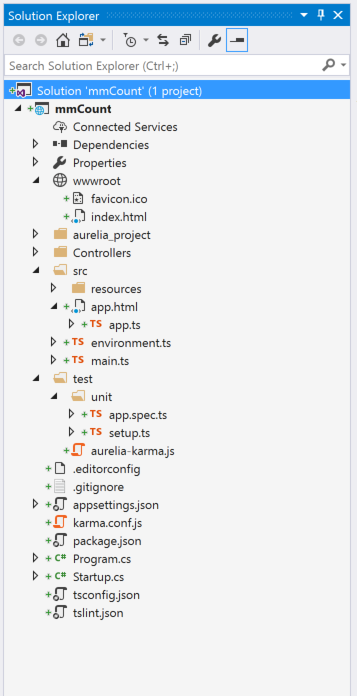
  • In the wwwroot folder it added index.html. This is the html document that will be loaded by the browser and host our Aurelia application. It has all the startup stuff that Aurelia needs to get going. You will hardly ever need to edit it. When the Aurelia CLI builds your project that output goes in this folder as well.
  • The aurelia_project folder contains a bunch of configuration and utilities that are used by the Aurelia CLI for this specific application. With the exception of one file, you probably won’t ever need to make any changes here. The nice thing about this is that you can tweak the way the CLI works for just this project and it won’t affect other projects.
  • The src folder is where you will write your actual code for the app. HTML, CSS and TypeScript will all go here. It starts with a few default files that you need to get the app going.
    • app.html and app.ts are the template and code for the root component of your application.
    • main.ts is what bootstraps and initializes your application.
    • environment.ts is a config file. The values it exports can be transformed by the CLI depending on the target environment that you want to release to (dev, stage, prod, etc).
  • The test folder is where you will write all your tests. It starts you off with a test for src/app.ts. We’ll talk about testing in another post.

At this point we can run the app that it just created. In the command line:

au run --watch

Now I can open up a browser and point it to http://localhost:9000/ to verify that my new Aurelia app is running. Whenever that command is run the Aurelia CLI will compile and bundle all the resources and copy them to an output folder. These files will get loaded into the browser by the Aurelia bootstrapper. The CLI will then start up a development web server that will host the web app. The --watch flag tells the Aurelia CLI to watch for changes in any of your code files. When it sees a change it will run the build again and then refresh the browser. I can test this by going to Visual Studio and editing the value for the message field in app.ts. A few moments after I save the file, I can see the change in the browser and I didn’t even have to refresh it.

Visual Studio

One of the things I really like about developing with Visual Studio it that it groups similarly named files together in the Solution Explorer. This keeps my templates and code together and makes it easy to find things. You can see how app.ts hangs under app.html in the tree view.

There is one thing that Visual Studio is doing that I don’t want it to be doing: It is automatically compiling my TypeScript files for me and putting the resulting .js files next to them. Since the Aurelia CLI is handling that for me, I don’t need VS to do it. It’s not a problem, it just pollutes the Solution Explorer (and git repo) with a bunch of files I don’t need in there that don’t even get used by the app. That’s easily fixed by editing the mmCount.csproj file and adding this property to it:

 <PropertyGroup>
   <TypeScriptCompileBlocked>True</TypeScriptCompileBlocked>
 </PropertyGroup>

It can go anywhere in the <Project> node. VS has already generated the .js files but there are only a few so it’s easy enough to delete them manually.

A front-end and a back-end

At this point there is fact that it’s important to be aware of: we have 2 separate apps in our one project. One of the apps is the ASP.NET Core app that is hosted by Kestrel and IIS Express. The other is the Aurelia app which gets served by the Aurelia dev server and executed in the browser. In development it’s great to have these two things separate because I can develop, test and debug each one separately.

I do need those two apps to communicate, though so I’ll take care of that which will wrap up this exercise of setting up the development environment. What I want to do is get the message that I display in the browser to come from the server.

The ASP.NET Core app

I need an API action to get the message from. That’s easy enough. In Visual Studio, I’ll edit ValuesController.cs and in the Get() method, I’ll change the return type to string and make it return the message I want to show in the browser. That looks like this:

public string Get()
{
  return $"Hello! The current time is {DateTime.Now.ToString("T")}";
}

Because the Aurelia client and Web API are two separate apps they are running on two separate ports. As such, I need to set up CORS so that the client can call the server. That’s easy enough, I’ll just add this line of code to the Configure() method of the Startup class:

app.UseCors(p => p.AllowAnyOrigin());

It goes just before the app.UseMvc(); line. Now I can compile the code and verify that it works. Ctrl+F5 with the default Visual Studio keyboard bindings will build and then run the app in the default browser.

The Aurelia app

Now I can call that API from my Aurelia app and assign the value to the message field. In Aurelia, bits of UI logic are called components and components have a lifecycle. Aurelia wants you to do certain things at certain points of that lifecycle with functions that you create in your code called lifecycle hooks. We’ll talk more about components’ lifecycles later. We’ll implement our functionality in the ‘activate’ lifecycle hook of the App TypeScript class.

The first thing I need to do is install an HTTP client. Since this is not necessary for every app, it is not installed by default. Because Aurelia is modular, I can use any HTTP client that I want but I’m going to use the one that Aurelia provides. In the command prompt to install it:

npm install aurelia-http-client --save

After the package is installed I need to let Aurelia know about it so that the bundler can include it and it will be sent to the browser. This is a little bit annoying because you have to manually edit a file but on the other hand, it’s a cool feature that you get so much control over the bundler and indeed the whole CLI. Open the file /aurelia_project/aurelia.json. There’s a lot going on in there. Go to the build.bundles property and find the item with name:"vendor-bundle.js". In that item there is a dependencies property. Add the value "aurelia-http-client" to that array.

Now I can use it to call the API to get the message. In app.ts import the http client so that it is available in the file. This goes at the top of the file:

import { HttpClient } from 'aurelia-http-client';

To implement a lifecycle hook, all you do is create a function on your class with the same name as the lifecycle hook. That looks like this:

activate() {
  var client = new HttpClient();
  return client.get('http://localhost:53537/api/values').then(r => {
  this.message = r.response;
  });
}

If you are following along, the URL you use in get() will probably use a different port. You can just copy it from the browser window when you tested the API action method earlier. When I save the file I can now see the message display in the browser.

Here’s what’s happening in the activate() function. The get() function of the HttpClient instance returns a Promise. The result of that Promise is an HttpResult object which has a lot of information including the text for the message which is on the response field. I assign the value of that response field to the message field of the class. Notice that the function returns the value from client.get(). Because it is a Promise, Aurelia will pause the lifecycle until the Promise resolves. This is a great feature that gives us the ability to control how the application transitions from one state to another. We’ll see more about this later.

All Done

So that’s it! The dev environment is set up and now I can start implementing the features of my app.

If you want to follow along, here is the git repo: https://github.com/matthewcv/Aurelia-mmCount/tree/master/mmCountThere is a tag called ‘blog-part-2’ that you can checkout to see the state of the code at the end of this post.

Up next: Upgrading Stuff.

Web App Development with Aurelia, Part 1: Introduction

This is the first in a series of blog posts which I am using to document and demonstrate the development of a real-world Aurelia web application. In this post I will describe the benefits of Aurelia and then I will talk what the app is and does and what technology stack I will use to develop it.

Aurelia is a modern, standards-compliant, component-based framework for building applications with JavaScript, HTML, and CSS.

Why Aurelia

Because it’s fantastic. It’s easy to learn and easy to be productive with. Here are some of the things that I really like about it in no particular order:

  • Convention over configuration. Follow a few of its rules – mostly around naming – and you have to write very little configuration code. This means that you don’t have to tell Aurelia where to find the html that matches the JavaScript for your components.
  • It has everything you need built-in. This means that you don’t have to have any dependencies on third-party libraries. HTTP client (AJAX), routing and navigation, data validation, dependency injection, i18n support and much more all already there for you.
  • It’s the framework that gets out of your way. There’s very little code that you have to write that the framework needs to be able to do its job. This means that you can focus on your application logic and your code is much cleaner and easier to maintain.
  • Very friendly template syntax. It’s standards-compliant HTML. No confusing characters or strange mixtures of JavaScript and HTML.
  • 2-way data binding. This means that your UI and your application state are always kept in sync and you don’t have to write any special code or use any third-party libraries to update your application state with user input.

There are a few other benefits about it that aren’t necessarily important to me but are worth mentioning here:

  • It will feel very familiar to developers who have worked on XAML applications and especially those who have used any of the MVVM app frameworks like Caliburn.Micro or MVVM Light.
    It is an official commercial product with available enterprise support. Many corporate development shops disallow the use of open source code because it isn’t commercially backed and supported.
  • It is highly extensible. Don’t like a particular convention? Override it! Don’t like its template syntax? Override it! You get the idea.
  • It is highly modular. Just because it has everything you need built in, doesn’t mean you have to use everything. Want to use its dependency injection system in your Node app? No problem. You can use just the DI module if you want. Don’t need to use routing or data validation in your web app? Easy. Just exclude them from your application and the code will never get sent down to the browser. This way you can make your web apps super lean.

A note on 2-way data binding. There seems to be a trend away from 2-way data binding in some modern frameworks and app-development patterns. There are good arguments for and against it. The architects of Aurelia decided that 2-way data binding is the way to go and have implemented it smartly and efficiently. It works very well and you never need to think about it. That being said, if you really like the idea of one-way data flow or immutable objects it is very easy to implement those types of patterns in your Aurelia app and still be able to take advantage of all the other great things it has to offer.

You can read more about what Aurelia is, its benefits, and its advantages on the Aurelia Doc Hub. There is also a great blog.

The App

I love m&m’s candy. They’re delicious. Plain and peanut usually but the others are great too. I also love numbers and stats and counting things. Do you see where I am heading with this? For years, I have kept a spreadsheet where I log a bag of the delicious candy. Each log entry is the count of each color of candy. The spreadsheet calculates a bunch of stats and totals.
So the app I am going to create in this series of blog posts is going to replace that spreadsheet. Here are the basic requirements of version 1.0:

  • Be able to enter the counts of each of the colors in a bag of m&m’s.
  • Be able to chose which type of m&m’s the bag is: plain, peanut, crunchy, etc.
  • Calculate/display basic stats based on those counts:
    • Total in a bag (all and by color)
    • Total of every bag entered (all and by color)
    • Distribution of colors by percentage for a bag
    • Distribution of colors by percentage for all bags
  • Show the color distributions in a chart of some kind like a pie or stacked-bar
  • Be able to log in. Each bag of candy should be tied to a user so that the above stats can be calculated by user and globally.
  • I only care about the bags with the traditional colors: red, green, blue, brown, orange, yellow.
  • Data storage will include basic audit data: who and when.

Obviously there’s much more that I can add but this covers all the functionality I get out of my spreadsheet.

The Tech

The web client will obviously be built on Aurelia since this whole series is about building web apps with Aurelia. The rest of the tech doesn’t really matter but here’s what I am going to use: Client code will be written in TypeScript. The server-side will be an ASP.Net Core application with C#. SQL Server for data storage. The whole thing will be hosted on Azure and I am going to use Visual Studio 2017 for development. I don’t really want to deal with auth and user profiles or anything like that so I am going to use Auth0 for that.

Up Next: Setting up the development environment.

Event handling and change detection in Angular 2

I’m really loving the new template syntax in Angular 2. Especially for binding events:

<button (click)="doSomething()">Click Me!</button>

You don’t have to use a directive. You only need to know the name of the event and the parenthesis are a good visual indicator of the direction the message is flowing.

One of the great things about Angular 2 is that there is no longer a digest cycle and no $scope. As such, you no longer have to depend on all the extra directives and angular APIs to do things and your code can be much more natural. In this example, I show how you can listen to keyboard events on the global window object with two different mechanisms: using Angular’s (event)=handler syntax and the traditional addEventListener() API.

Take a look at the demo app: http://matthewcv.github.io/blogs/angular2events.html

You use the keyboard to toggle the visibility of the boxes. For the green box, I am using the angular template syntax. The difference here is that I am applying the event handler in the host property of the Component annotation:

 AppComponent.annotations = [
   new ng.core.Component({
     selector:'my-app',
     directives:[],
     template:getTpl('my-app'),
     host:{
       '(window:keydown)':'ngKeyDown($event)'
     }
   })
 ]

It doesn’t seem to work when I apply that in the html on the <my-app> element. The window: part tells angular to bind the event to the window object rather than the <my-app> element.

For the red box, i am using the addEventListener API in the constructor of my component. The handlers simple toggle a boolean value which is bound to an ngIf directive on each of the colored boxes. Both mechanisms work exactly the same as you would expect. This wouldn’t work at all in angular 1. You’d have to make an explicit call to $scope.$apply().

An important note

Using addEventListener works and it’s great that it works but it is strongly recommended that you do not use this in your components and directives. There are a couple reasons for it:

  1. It couples your code directly to the browser API which means that your component won’t work anywhere else – like server side rendering or web-workers.
  2. When you use the (event) syntax, you get a bunch of extra help from angular for free. Angular will automatically call the listener in the scope of your controller so ‘this’ in your function will work as you expect. Angular will automatically remove the event listener when the component is destroyed which will prevent memory leaks. This is a thing you had to do manually in Angular 1 custom directives.

Going Big Time!

I made the leap to full-time consulting and freelance work.  I’ve been doing consulting and freelance work for a long time actually but as a sub-contractor.  Now it’s real.  You can hire RanchoBebop directly and we can help you out!

Do you want to start a software project?  Interested in a new technology but not sure where to start or how to integrate it?  Think your development process and application life cycle can be improved?  Want to go have a beer?  Want to go for a run or bike ride?  We can do all that stuff!

We really love software development and want to spread that love around by developing your projects for you or showing you how to develop them.  We can work with alot of technologies.  We can be on-site or remote.  Big projects or small.  Reach out on Twitter and let’s have some fun!  @RanchoBebop

No, you still can’t call client JavaScript from server code.

Well, not directly any way.  I mean, obviously there’s web sockets but that’s an impossible response for the asker of the “how do I call this javascript function from my code-behind?” type of questions we still see littering stack overflow.  I just answered this question asking the same type of thing.

I don’t mean to belittle anybody, especially folks who are just learning and I’m happy to help. I just thought that these types of questions would have stopped by now.

Browser Inconsistencies. Still.

You’d think that after all this time the latest versions of the major browsers would all pretty much be the same.  Uh, not really.  Especially when it comes to HTML5 implementation.  HTML5 is pretty new but jeez, since it’s so new don’t you think that browsers that implement features would at least do it the same?  Right now I’m talking about <input type=”number” />.  It’s supported in IE and Chrome, not Firefox yet.  I hear the next version of Firefox will support it.

A web app that I’m working on has a them because I want to enter a bunch of numbers. Since Firefox doesn’t support it, it doesn’t matter.  You can enter anything.  In Chrome, you can enter any text you want but if it’s not strictly a number, then the ‘value’ property of the dom object is blank.  This causes problems because there is still a value on the screen so if you try and notify that there is no value the user’s going to think you suck.  IE actually has the right implementation according to the spec.  If you enter a value that’s not a number, the field goes blank when it loses focus.  Now the value property of the dom object matches what shows on the screen.

Obviously I can look at the ‘validity’ property of the dom object but even that is inconsistent across browsers and I really don’t want to check a bunch of different places to know if the input is correct.  Fortunately, I can make my life quite a bit easier with just a few lines of code. And jQuery.

$("input[type=number]").on('blur', function() {
if (this.validity &amp;&amp; this.validity.badInput) {
this.value = null;
}
});

It should be pretty obvious what’s going on here but I’ll explain any way.  Chrome’s implementation of the ValidityState object has that badInput property and wouldn’t you know, its value is ‘true’ when the input is bad.  What I’ve done here is mimic IE’s behavior for chrome.  Imagine that.  We’re usually trying to get IE to mimic the other browsers’ behavior.

Firefox 28 is supposed to have support for number input types.  It’ll probably be different than Chrome and IE so I’ll probably have to adjust this script.  For now, it’s great.